Wednesday, February 23, 2011

I'm So Lucky AND Free Printable


I've been thinking a lot about how much time I spend crafting.  It's probably about time I start making some crafts that are somewhat meaningful.  Having a fun hobby and making cute things is great, don't get me wrong,  BUT I dedicate a lot of time to making cute things without much purpose other than "cuteness".

In honor of St. Patricks day, I wanted to remind my family how lucky we are.  Which we are.  We are very lucky.  Lucky to have a home, lucky to be together, lucky to be loved...the list is endless.  Maybe some of that Irish luck was passed down from earlier generations.  Who knows?  The point is, we have it good and it never hurts to be reminded just how good that is.  

Want to join us?  Here's how:

Materials:
"I"m So Lucky" sign (see below)
8 X10 picture frame
ceramic pot (or anything else you deem suitable)
yellow cardstock
spray paint
pens
jar

I picked up a few things at the thrift store last time I was there: a wooden picture frame for $.25 and ceramic pot for $1.


I spray painted both black.  The pot took several coats.  I recommend following the instructions on the can and doing it on a warm day.  I didn't realize it needed to be 50+ degrees to work well.  It took FOREVER to dry. 


 I also embellished the frame with a few rosettes, some beads, and twine.  Similar to these.  


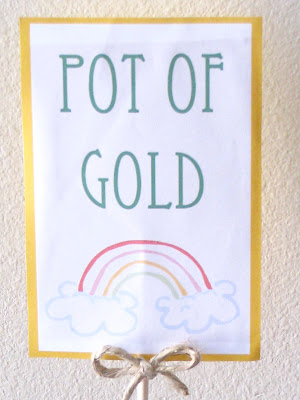
Then I printed out my signs.  You can use one of these or make your own.  I made mine using Photoshop but lots of programs can do the same. 


**If you click on the one you want to use, it should allow you to print.  Let me know if it doesn't work.  I've never tried this before.  

I pasted my "pot of gold"sign to a piece of card stock and glued it on a wooden dowel.  


And stuck it in the pot.


Then I cut out a bunch of gold coins from yellow card stock (big enough to write on) and placed them next to the pot with some pens to write with.  


The idea is for anyone passing to write something that makes them feel lucky on the coin and put it in the pot.  By St. Patty's day hopefully there will be a pot full of gold.  Ours is small but I somehow think it will be hard to fill all the way up.  Maybe some of you are more ambitious than us?  


Oh...you notice those other gold pieces?  Well thats because some of us might need a little encouragement to participate. 


Consider it a trade...a note for some delicious gold coins?  Yes please.


Throughout the month, or on St. Patrick's Day, take some 'gold' out and find out what makes your family feel lucky.   I realize that luck may not be the best word to use here but for holiday purposes I think it works. 


Monday, February 21, 2011

Stylish Blogger


I was given a Stylish Blogger Award by Allie from Miss Lovie (who would definitely be on my list if she hadn't already received one).  Thanks Allie!  So nice of you to think of me!


So the rules for accepting the award are...
  1. Thank and link back to the blogger who gave you the award.  See above.  
  2. Share 7 things about yourself.  See below. 
  3. Award eight recently discovered stylish bloggers.  Doesn't have to be fancy.  A simple link will do.  See Below.
  4. Contact the bloggers and inform them of their award.
7 random things:
1.  I want to travel the world.
2.  I eat an avocado pretty much every day.  An expensive but yummy habit.
3.  My favorite TV show is Psych.  Clean and funny dramedy.  Doesn't get much better than that.  
4.  My husband is a better cook than I am.  I'm much better at baking.  
5.  Speaking of him, he used my sewing machine before I did (a story for another day).
6.  I am afraid to make a quilt, but really want to.
7.  I usually have 3 or 4 projects going at the same time.  Not necessarily the most efficient way to sew, but helps keeps things interesting.  

8 blogs I recently discovered and LOVE:
Several of Tammy's projects are on my to-do list.  Currently, she's working on a "Nearly 365" project where she plans to make something (and complete it!) every day this year (except Sunday).  Incredible.  My goal is 2 a week and I barely make it.  Her felt cakes made me fall in love with felt again.  


I love her Fashion Friday's where she shows off her cute little girl in stylish attire.  I seriously need her to dress my little girl.  She also shares things she makes for her shop Lolly Frocks.  Ruffled Diaper cover?  Yes Please.


A blog with lots of ideas.  I love this blue baby dress.  So cute.  Not enough blue out there for girls.


Shannon has a cute blog with lots of ruffles.  There's always room for more ruffles.  Love this super ruffly pillow.  


I love that most of her projects are kid friendly.  Right now she is featuring a bunch of posts about her daughter's birthday.  I am in love with this Eric Carl birthday banner.  


Love the simple design of this blog (easy on the eyes).  Love that sisters and friends joined together to make it happen.  Love this make your own kids book.  The tutorial is coming Tuesday!  Personalized and adorable.


Beautiful blog with some some amazing projects.  Her newest post, a Pottery Barn knock-off, is amazing.  The colors are great and can't believe she made it from crepe paper.


I love this blog.  Her little girl dresses are crazy good.  I want a replica of every single one of them.  See?  You do too, right?

Thursday, February 17, 2011

Shirred Overalls

It's easy to make cute dresses and skirts for the summer, but I have a hard time coming up with weather appropriate attire for the little one when it's cold out.

I want something cute and feminine, but functional.  The little one has just learned to crawl, so a roomy pair of pants is ideal right now. But i'm sooo tired of pants.  Seriously.  So she ends up wearing leggings under a onsie most days.  Nothing wrong with the 80's aerobics instructor look, but we need a little more variety around here.  

Solution:  Shirred Overalls.  I. love. them.


I started with the Summer Vacation Dress from MADE.  It has a shirred top and several variations.  If you do not have the pattern, it's only $6 and totally worth it.  She gives excellent tips on how to sew with elastic thread.

I made the entire dress with straps, buttons and even a hem.  Rather than hemming just below the knees, I extended the length all the way to the ankles (so I could end up with long overalls instead of a shortie).

Any dress pattern with a gathered waist will work (extra fabric for room in the legs).  I suggest one with a shirred top, unless you add snaps to the bottom, for easy removal.

Here's my dress before I added legs: (it was almost too cute to cut, but I went for it anyways)


1.  Cut.  I took a long body suit that I already owned and lined it up on top of the dress.  I used this as my guide to cut out the crotch.  As you can see below, I forgot to leave room for seams.  I would suggest adding a 1/2 inch around the whole crotch area for seams.   


A different angle.


2.  Crotch piece.  Now we need to make the crotch piece.  On the body suit I already had, it looked like this.


I cut out a similarly shaped piece using this one as my guide.  Straight on one side and curved on the other.  This is important because it will attach to the front of the overalls in a straight line and curve in the back to give a little wiggle room for big baby bums. 

A piece that is curved on both sides will also work, you will just be able to see it from the front and back when they are worn.


3.  Line up and pin.  I found the middle of the crotch piece by folding it in half and marking it with a pin.  I did the same for the back side of the overalls. 


Match the two center pins with fabric right side together like this:


and pin the curved side of the piece to the back side of the overalls.  Like this:

Please excuse the funky geometric print....I didn't do this right the first time, so I had to take pictures with some scrap material.

4.  Sew using a 1/2 inch seam.  Serge or zig zag and trim off the excess.

5.  Iron flat.  Now you have something like the photo below.  You want to have extra fabric on both sides of the crotch piece.  You'll probably have more than shown in the photo below.  


6.  Turn the overalls right sides together.  Pin the front legs of the overalls to the back legs with the straight edge of the crotch piece acting as the center for the back legs.  Treat the crotch piece as part of the overall leg piece and pin the whole thing together.  It was hard to get a good picture of this, but you can sort of see what I mean below:


7.  Sew using a 1/2 inch seam.  Serge or Zig Zag and trim the excess.


8.  Iron.  Now you should have something that looks like this:


9.  Insert elastic thread into your bobbin.  With the settings that work best on your machine for shirring (usually high tension, long stitch length), sew 3-4 rows of elastic thread around the bottom of each leg to create the gathered look.  You could also sew on 1/4 inch wide elastic about 1/8 inch away from the bottom hem of each leg if you don't want to mess with elastic thread.


And thats all.  If you haven't already noticed, I did not make this with snaps for easy removal.  The benefit of not having to insert them far outweighed the benefit of having them there for diaper changes.  The top is stretchy and super easy to get off, so it hasn't been a problem.  You could easily add 5-6 snaps along the crotch area by reinforcing the edges with more fabric and inserting the snaps.  For a good tutorial on this visit Made by Rae here.  

Her faces get funnier every day.


It's hard to get a front shot.  She can't stand on her own yet, but you get the idea.


Cute bum.


And it's near impossible to get her to hold still long enough to snap a photo.  We're working on it.


Tuesday, February 15, 2011

Giveaway Winner!

The V and Co. Giveaway winner is...


Comment #13 who said:


I also posted on twitter. BTW - I love the ruffle pillows you made in your latest post. So cute!  Hugs...Tracy :)


Congratulations Tracy!!  I'll be contacting you shortly to get you your prize.  
Hope everyone had a wonderful Valentines Day!
We'll chat again soon.