


I saw these on the Anthropologie website and knew I needed them. But who wants to pay $48 dollars for a pillow case?
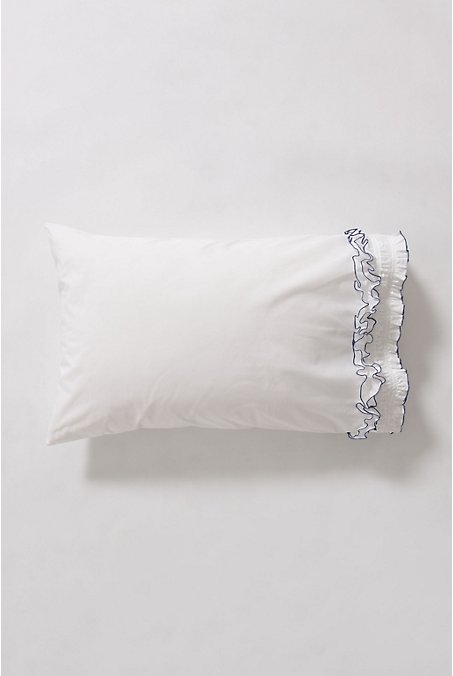
So I made theses instead.

I think they turned out pretty great. Plus I finally got to use this cream and white stripped fabric I've been dying to use but haven't found the right project for.

I used the tutorial from MADE for pillow case dimensions and basic assembly. If you need it, I suggest going there for extra help.
About 1 3/4 yards of fabric
Wooly nylon serger thread (optional)
1. Construction:
1. 1. Cut Material. Use the chart below. You will end up with 4 rectangles. All dimensions below are in inches.
Rectangle | Folded | Unfolded |
Main Piece 1 | 20.5 X26 | 45 X 26 |
Main Piece 2 | 20.5 X 11 | 45 X 11 |
Ruffle 1 | 45 X 6 | 90 X 6 |
Ruffle 2 | 45 X 7 | 90 X 7 |
Again, MADE has some diagrams here that might be helpful for the main pieces. The ruffled pieces will look like this (folded in fourths):

I happened to have a large piece of fabric to use. If you do not, you may need to sew two pieces together to get the correct length for the ruffled pieces. This will be perfectly fine. The ruffles will hide any seams you don't want showing.
2. Iron the border piece in half so that you have a folded rectangle measuring 11" X 20.5".
3. Serge edges. Take both ruffle pieces and serge the long edges of each to prevent from fraying. I used wooly nylon thread and set my machine up to do a rolled hem to get the effect you see in my pictures (see your owners manual for set-up).

**If you do not have a serger I suggest doing a tight zig zag and triming the edges or using a rotary cutter to trim the edges to keep from fraying. Some sewing machines can also do a rolled hem. Check your manual. You may need an extra foot to do so.
4. Iron. Take the 6" ruffle piece and iron almost in half. I allowed the bottom layer to show about 1/2 an inch (as shown below). Make sure the serged edges you want showing are facing up.

5. Gather. Set your sewing machine up for a gathering stitch (longest stitch length, highest tension). Sew about 1/4 inch down the folded edge. Do not back stitch at the front or end of the stitch.

Leave your settings the same and sew two gathering stitches about 1 1/2 inches from each side of the other strip.

Take the bobbin thread of the folded piece and pull until the piece begins to gather. Gather until it reaches the same length as the border of the pillow case.

Do the same for the other ruffled piece.

I like to lay my pieces out on the pillow case to make sure I have gathered them to the correct length.

Iron the ruffles down. This will make it easier to sew.

6. Pin. Take the folded ruffle. With right side up, align it with the edge of the pillow case where the border piece will attach. Then take the border piece and align the raw edges, right sides together to create a sandwich.

Like this.

Pin in place.

7. Sew. With a 1/2" seam, sew the sandwich together.

Thread your serger back to normal. Serge of the seems. Or zig zag stitch and trim.

Turn and Iron out the seams. No need to top stitch. This part will be covered.

Now you should have this.

8. Pin. Align the the next ruffled piece with the top edge of the border so that the ruffles just cover the border underneath but still allow the ruffles to show at the other end. Pin in place.

9. Sew. Secure the ruffle by sewing in two places. I sewed directly over the gathering stitches that were already on the ruffle. If the gathering stitch is not straight, do your best to sew a straight line as this will be visible on the completed pillow.

Use your hand to flatten down the ruffles as you sew.

Unpick any gathering stitches that are not in line with the new stitch.

Now you should have this.

Originally I planned to sew 1/4" bias tape over the top of the stitching. I liked how it looked when I got to this part, so I left it off. Your call.
10. Finish. Fold the pillow case right sides together. Pin edges and sew a 1/2 inch seam allowance.

Sege off the seems or zig zag and trim.

Turn pillow case so right sides are out and push out corners. Iron seams flat.

Put that pillow case on your pillow and rest your head a little.

Or play a little. Whichever you prefer.


Be careful..things might get a little too crazy.

So don't be surprised when your model gets grumpy and decides to take a nap instead.

 |


oh i am in loooove with your little munchkin .....what a beautiful series of photos.....total love!
ReplyDelete&
i adore your cushions....thanks for the *talk through*...i too have fabric i have been keeping for such a project....
i will be attempting these very soon...and will link back to you when i do...your photos are too sweet not to share!!
lovely to meet you...
melissa x
Gorgeous!! I have loved the Anthro design since the first time I saw it. I absolutely love how your pillow cases turned out!
ReplyDeleteAdorable, as always! I even think your pillow cases look better than Anthropologies. :)
ReplyDeleteaw. how sweet is that baby! The pillows are great, too, of course. Love them. My guest room pillows may need some revamping. Thanks for sharing!
ReplyDeleteThose are beautiful! I like your version even more than the Anthropology one!
ReplyDeleteBeautiful job on the pillows! Love them. Your baby is so adorable!
ReplyDeleteYou dont know how much I LOVE these!!! :) I was just looking for these myself and never could really find exactly what I wanted AND the ones I did see were WAY to expensive! Yours look great!
ReplyDeleteThose are ABSOLUTELY PERFECT!!!The fabric could not have been better! I am in love! Are you taking orders? lol
ReplyDeleteI am your newest follower and I LOVE LOVE LOVE this. I would be honored if you would link your blog up on my blog stalkin' page. Look forward to much more from you... you are amazingly talented.
ReplyDeletehttp://alaynahoward.blogspot.com/p/blog-stalkin.html
Came from the AllieMakes party! These are A-D-O-R-A-B-L-E ! Your choice of fabric really enhances them. And how could I not fall in love with them? You've employed perfect marketing; an irresistable little girl for a model! How can you get anything done when you have her to look at?!
ReplyDeleteThese would make a great mothers day gift. So would the baby :)
ReplyDeleteOmg this is so cute! I like yours better than the anthro one.
ReplyDeletePlus theirs doesn't have a cute baby on it ;)
*new follower :)
come check me out:
www.foundintheali.blogspot.com
ali
Wait...you know your pillowcases look WAY better and more expensive than the Anthro ones, right?! I'm officially obsessed.
ReplyDeleteWhat a great tutorial! Thanks so much. Don't you just love replicating expensive things like this! You save money & feel much more accomplished.
ReplyDeleteso awesome! These are going on the to do list. Plus I think they are better than the originals. :)
ReplyDeleteHi! I saw you on Ucreate today. These pillowcases are so pretty! Your little one is darling!!
ReplyDeleteIt is post like these that make me wish I had taken the time to learn to sew. Those are fabulous. Thanks so much for joining our Spotlight Saturday Blog Hop! I'm following you back.
ReplyDeleteKel
www.betweenthelines-kel.com
Love love love it! I needed these too thanks for the instructions. Now I wont have to buy them and hide them from my husband lol
ReplyDeleteOoh! I like your version better. Looks more rich and classy than the original.
ReplyDeleteI just found your blog through todays top 20, I LOVE this pillow case and have to have to make it!!! Thanks for sharing!
ReplyDeleteYou've been featured today at Sweet Peas and Bumblebees for our Fabulous Friday Finds. Your project is amazing!!!
ReplyDeletehttp://www.sweetpeasandbb.blogspot.com/
This is amazing! I came by to say thanks for commenting on our blog and got sucked in by all the ruffles! I think I'm going to make my sister make me these (she's the sewing one! and she has a serger...)
ReplyDeleteDot
super cute! and your lil one playing on the newly made pillow is so cute!
ReplyDeletewww.itsacowgirlthing.blogspot.com
I don't know which is cuter, your pillow or your baby! I so wish I had a serger. It turned out so well!
ReplyDeleteWhat a precious baby!
ReplyDeleteI gotta say..I prefer yours over the Anthropologie one!
Thank you so much for the tutorial, I'm looking forward to making some of these for our bed. Also will make a smaller version for the new grandbaby's crib, buggy etc. What I really wanted to comment on is the absolutely georgeous model you used.....even if she got a bit grumpy towards the end!! That is one beautiful child and so photogenic!! Is she yours? This is my first visit to your blog, via knock off, I'll have to thank them for sending me here!! I believe I will be your newest follower. Thank you again for a delightful lesson!!
ReplyDeleteTake care, VBg
I umm... actually was going to buy the sheet set ... but wanted to buy them in the store because I didn't want to pay the extra for shipping (or wait for them to arrive) I then thought maybe instead I'd make them myself and was looking online for ribbon that was similar that I could just sew onto the end of an existing pillow case (which I thought was kinda ghetto) this ... is so much more civilized!! Fingers crossed that I can manage this (I'm not all that great with the sewing machine or following directions to be perfectly honest. There WILL be swearing. And sweating. And inevitably.... drinking.) Thank you thank you thank you THANK YOU so much for this!!!!
ReplyDeleteI love this! I just stumbled across your blog - you've got some great tutorials. I think I'll try this out with some boring pillowcases I have now :)
ReplyDelete-Amy
Love these pillow cases! So simple and romantic looking. Pinned it. Came over from AGAAGG
ReplyDeletevery lovely pillows ...I have a passion for pillows and cushions and your are prettiest.... I came here via Tipnut....
ReplyDeleteI pinned it on my board
Happy if you come to see me at
http://craftaworld.blogspot.com/
with love from
Farah
Just finished making one of thee w/light pink serger thread - it looks great - I am making 7 more for my great nieces and granddaugers to be embroidered with their names for Christmas - my daughter sent me to this blog and I am so glad she did - I do have a couple of hints that I did that you might want to try - my mother taught me - when you have a lot of gathering to do as this project has - instead of just one row of gathering stitches to run two - one about 1/4" from the other - pull both bobbin stitches at the same time as you gather the material - once the final stitches are sewn - one of the gathering rows can be easily removed.
ReplyDeleteAlso on the 6" piece instead of folding in half - I decided to cut that piece into a 2-1/2" and 3-1/2" piece and then placed the smaller on top of the larger one and gathered them together as one; my material showed a definate difference between the right and wrong side - this way both ruffles had the right side of the fabric up. Happy Sewing - Love this Blog. To bad we didn't have this kind of info back in my day!!
Hi! I love this and would love to feature it on www.sewcanshe.com. Please drop me a line at caroline@sewcanshe.com and let me know if that's okay.
ReplyDeleteThanks so much!
Caroline
Hi! I love this and would love to feature it on www.sewcanshe.com. Please drop me a line at caroline@sewcanshe.com and let me know if that's okay.
ReplyDeleteThanks so much!
Caroline
GREAT tutorial, and the baby is the BEST!
ReplyDeleteSuch a great idea! I could use a little more ruffle in my life!
ReplyDeleteLOOOOOVE THIS! I'm definitely bookmarking and pinning. :) And such an ADORABLE baby. Such a cutie pie. :)
ReplyDeleteGorgeous pillowcase. I featured it here:
ReplyDeletehttp://sewprettysewfree.blogspot.com/2013/03/ruffled-pillowcase-sewing-tutorial.html
From the same model of comforter cover we can find its variant in quilt, comforter or comforter cover; and within each of them there is a wide variety of styles in quilts, comforters or comforter covers of different types
ReplyDeletehttps://vogliadicasamia.it/categoria-prodotto/letto/copripiumino/