


It's easy to make cute dresses and skirts for the summer, but I have a hard time coming up with weather appropriate attire for the little one when it's cold out.
I want something cute and feminine, but functional. The little one has just learned to crawl, so a roomy pair of pants is ideal right now. But i'm sooo tired of pants. Seriously. So she ends up wearing leggings under a onsie most days. Nothing wrong with the 80's aerobics instructor look, but we need a little more variety around here.
Solution: Shirred Overalls. I. love. them.


I started with the Summer Vacation Dress from MADE. It has a shirred top and several variations. If you do not have the pattern, it's only $6 and totally worth it. She gives excellent tips on how to sew with elastic thread.
I made the entire dress with straps, buttons and even a hem. Rather than hemming just below the knees, I extended the length all the way to the ankles (so I could end up with long overalls instead of a shortie).
Any dress pattern with a gathered waist will work (extra fabric for room in the legs). I suggest one with a shirred top, unless you add snaps to the bottom, for easy removal.
Here's my dress before I added legs: (it was almost too cute to cut, but I went for it anyways)

1. Cut. I took a long body suit that I already owned and lined it up on top of the dress. I used this as my guide to cut out the crotch. As you can see below, I forgot to leave room for seams. I would suggest adding a 1/2 inch around the whole crotch area for seams.


2. Crotch piece. Now we need to make the crotch piece. On the body suit I already had, it looked like this.

I cut out a similarly shaped piece using this one as my guide. Straight on one side and curved on the other. This is important because it will attach to the front of the overalls in a straight line and curve in the back to give a little wiggle room for big baby bums.
A piece that is curved on both sides will also work, you will just be able to see it from the front and back when they are worn.

3. Line up and pin. I found the middle of the crotch piece by folding it in half and marking it with a pin. I did the same for the back side of the overalls.

Match the two center pins with fabric right side together like this:

and pin the curved side of the piece to the back side of the overalls. Like this:

Please excuse the funky geometric print....I didn't do this right the first time, so I had to take pictures with some scrap material.
4. Sew using a 1/2 inch seam. Serge or zig zag and trim off the excess.
5. Iron flat. Now you have something like the photo below. You want to have extra fabric on both sides of the crotch piece. You'll probably have more than shown in the photo below.

6. Turn the overalls right sides together. Pin the front legs of the overalls to the back legs with the straight edge of the crotch piece acting as the center for the back legs. Treat the crotch piece as part of the overall leg piece and pin the whole thing together. It was hard to get a good picture of this, but you can sort of see what I mean below:

7. Sew using a 1/2 inch seam. Serge or Zig Zag and trim the excess.

8. Iron. Now you should have something that looks like this:

9. Insert elastic thread into your bobbin. With the settings that work best on your machine for shirring (usually high tension, long stitch length), sew 3-4 rows of elastic thread around the bottom of each leg to create the gathered look. You could also sew on 1/4 inch wide elastic about 1/8 inch away from the bottom hem of each leg if you don't want to mess with elastic thread.

And thats all. If you haven't already noticed, I did not make this with snaps for easy removal. The benefit of not having to insert them far outweighed the benefit of having them there for diaper changes. The top is stretchy and super easy to get off, so it hasn't been a problem. You could easily add 5-6 snaps along the crotch area by reinforcing the edges with more fabric and inserting the snaps. For a good tutorial on this visit Made by Rae here.
Her faces get funnier every day.


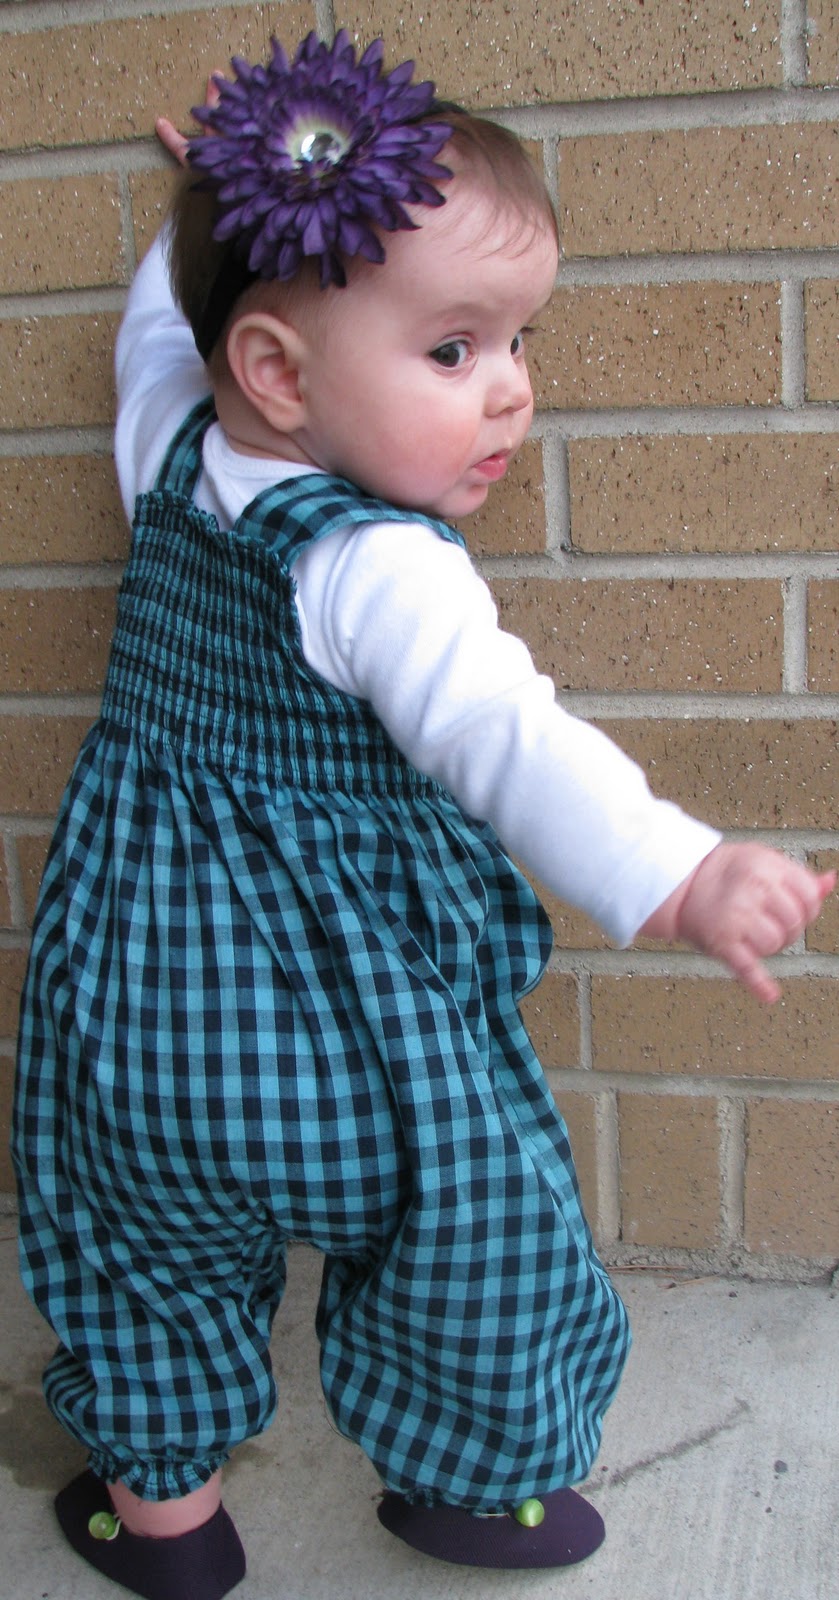
It's hard to get a front shot. She can't stand on her own yet, but you get the idea.


And it's near impossible to get her to hold still long enough to snap a photo. We're working on it.


Very cute! I love that you made overalls.
ReplyDeletejustenoughstyle.blogspot.com
Way cute!
ReplyDeleteThose turned out crazy cute.
ReplyDeleteI also wanted to let you know that I awarded you the Stylish Blogger Award! Congrats and come on over to check it out!
http://missloviecreations.blogspot.com/2011/02/exciting-news-and-some-blogs-you-should.html
Oh My word! That is absolutely adorable!!
ReplyDeleteThanks for linking up to Making It With Allie! I can't wait to see what you have for next week!
AllieMakes.Blogspot.com
So CUTE! Thanks for the fun idea!
ReplyDeleteladycreate-a-lot.blogspot.com
Cute!! Any tutorials for boy clothes in the near future? :)
ReplyDeleteYes! I know they are lacking. I need a little inspiration for "boy stuff" around here....but some are in the works.
ReplyDeleteThat is SO cute! I haven't tried kids clothes yet. I'm a bit intimidated by clothing. You did a great job!
ReplyDeleteOh this is so so cute
ReplyDeleteThe shirred overalls are probably the cutest girly thing I've seen lately for the cooler weather months!!
ReplyDeleteJenny
Thanks for the stylish blogger award!
Oh my gosh this is absolutely adorable! Stopping by from the WWBH.. I am your newest follower cause.. you're awesome! Hope you stop by and visit me @ http://pinkapotamus.blogspot.com.. Oh and I hope you'll share your overalls with my Pink Hippo Party!
ReplyDeleteVery cute. I love this idea.
ReplyDeletewell done job!!! I made my self a tutorial on the pillowcase dress last summer, into a jumper!!! Maybe a nice change!! I am planning to make my girls a shirred jumper now for the summer...
ReplyDeletetoo cute!!!
ReplyDeleteFeel free to stop by and link up to my Make & Share 1st edition today and come back every friday thru saturday!
~ Christy
I love all the shirred projects you do. I want to try shirring but I'm a little nervous. It looks intimidating for some reason :P
ReplyDeleteI love all the shirred projects you do. I want to try shirring but I'm a little nervous. It looks intimidating for some reason :P
ReplyDeleteOh my goodness that is SO cute!
ReplyDeleteJulianne
www.sewfantastic.blogspot.com