Tuesday, May 24, 2011

Checker Board Picnic Quilt (the cheater way)

I honestly don't know if I can even call this a quilt because I cheated in every way possible.  Seriously.  Just wait till you see how.  To me, a quilt has batting, squares, and a backing, so I call it a quilt.  If you are a quilter, hide your eyes.  They may burn after you read this post.

Ok.  I started with a sketch of the a checker board.  I wanted it to be very large, so my pattern looked like this.  

1.  Since these are my final measurements I cut my squares to 9" x 9".  You'll need 32 squares of each color to make the checker board.  

2.  Once you get them cut, sew them together like you would any quilt using 1/2" seams.  Just be sure to keep the rows in order.  I layed the entire quilt out on the floor and sewed together the squares of one line at a time before sewing each row together.  

3.  Ok, here's where I cheated the first time.  I used Rae's method for her Cheater Quilt Binding (scroll down past the crayon quilt part and you'll see it).  To do this, I cut my batting slightly larger than my quilt front (about 65"x 65").  Then I cut my backing about 66" x 66" because my backing was too thick to fold over only 1/2" like Rae suggested.  I folded and ironed over the backing with the whole quilt spread out on the floor (my carpet was fine, but I would be careful when you first start).  Then I pinned it in place a sewed around the whole binding as close as I could get to the binding edge.  Since my backing was a heavy weight denim, I used jean colored thread so that it would not show and a jeans needle.

4.  Here's the second- much worse than the first- cheat.      


If you click on the picture above and look really closely at the corners, you will see some invisible thread.  I realized when I finished sewing the quilt together that it would be much to big/time consuming for me to machine quilt and I didn't want colored thread to show by hand quilting, so I decided to compromise.  On all four corners of each square, I sewed a button hole stitch to keep the front from coming apart from the backing.  I used invisible thread on the front and jean colored thread on the back.  It is nearly invisible when you look at it but does the job well.   

Here's another view:


And thats all I did.  Completely cheated, but I love how it turned out.  And I finished the whole thing in a few hours.  I think it could have dragged on much longer had I used traditional methods, but would probably look better.  I'm ok with this method though, since I'm not a 'purist'. 


It's already been put to good use...checkers and picnics.


Plus I'm loving how big it is.  Big enough to fit our growing family and big enough for us to lay on at the park.  Love it.


This post was sponsored by:

Thursday, May 19, 2011

I'm Back...

I took a vacation.  From blogging, sewing, pretty much everything.  I went to visit my family for about a week and a half.  Just got home last night.   Usually today would be spent cleaning and getting things back to normal, but while I was away, my husband took care of everything.  The house is cleaner/more organized than it has been in months.  He is the greatest.  You have no idea.  I hate going on vacation without him....but when I come back to a home like this...I seriously consider doing it again.

So, I think i'm going to sew today instead of clean.  If I'm lucky, maybe I'll have something to show you later before the week is over.  I have some things I've been dying to try since I've been away.  Plus, I only entered "blog land" once while I was away, so I have a lot of catching up to do around here as well.

Also, I had to drop out of the Extreme Makeover contest.  A few weeks ago I pulled a muscle in my shoulder and I just couldn't keep up with the sewing...mainly because I couldn't hold my arm up long enough to sew a 6 inch straight line.  It's feeling lots better now.  I just have a knot in my shoulder the size of a grapefruit, but that's going away too.  BUT, they have a wildcard for the last round, so maybe I'll be back for the last week if I can get my act together and get some things done.

Hope you are having a lovely week.  I'm slightly disappointed to come home to such horrible weather, especially when I was vacationing in a very sunny and warm place, but no matter how much fun I have when I'm gone, I always love being home again.

Saturday, May 7, 2011

Late notice, Please Vote!

Extreme Makeover: Fabric Edition

Extreme Makeover projects are up so go over and vote!  

There are some really great ones this week...it's going to be tough to choose.   You can also head over to Wildflowers and Whimsy to enter this weeks giveaway, which you won't want to miss.  I know I'm late getting this up, but please don't forget to head over to Extreme Makeover Fabric Edition and vote, it ends Sunday night!

Thursday, May 5, 2011

Picnic Basket


I love this basket.  It was so easy to make and so fun to use.  It's something I've always wanted to have and actually having one now makes me want to go it the park in pretty dresses, eat watermelon and pb&j and watch the clouds go by.

Ok, no watermelon this time, but a nice apple and homemade jam will do just fine.

Want to do that too?

It's easy and you probably have most of this stuff lying around your house.

Materials:
Large basket
Cardboard (I used a small office file sized one, but it will depend on how big your basket is)
1/2-3/4 yard fabric
1/2-3/4 yard quilt batting
Fabric scraps for front/back and side ties
hot glue
ric-rac (optional)

Construction:

1.  Put your basket face down on top of your cardboard and trace.  If your basket has a handle like mine, do have at a time on the edge of a table so the handle can hang off.  You want this piece to be slightly smaller than the basket, so that it rests right inside the ridge when closed.

2.  Cut out the traced shape and lay on a slightly larger piece of cardboard.  Tape two markers or pencils together and trace onto the larger piece.  This is so that the top of the lid will hang over the basket ridge like a lip.  The ridges on the side of mine are for the handles because the handles on my basket jut inwards on the inside of the basket, so I needed to accommodate for them.  
 

3.  Use a ruler and pencil to mark a 2 inch section out of the middle of the smaller cardboard lid piece.  Cut it out so that you now have 3 pieces.  Two smaller half lids and one large lid.  On the large lid, take and exacto kinfe and very carefully perforate  the middle so that it bends on either side of the handles.  If you look carefully at the photo, on the larger piece of cardboard there is a green line towards the middle.  This is where I made my cut and directly opposite of that as well (2 perforations total). 

4.  Take each piece of cardbaord and lay it on the wrong side of a batting and fabric piece (trimmed to be about 2 inches larger on every side).   

5.  Starting with the batting, glue to the cardboard to cover completely.  Repeat the same steps with the fabric.  I used the same method as I did in the Rosette Letters.  Repeat this step on all 3 cardboard pieces.  On the large top piece, be sure you pull the fabric around the cardboard very tightly to ensure it doesn't pucker strangely when you open and close the lid.  
 

**I had more pictures of these next steps but they are MIA.  I can't find them on my computer anywhere.

6. Sew two long strips (mine were about 30" each) of fabric to create your two front and back ties to keep the basket open or closed.  You could also use ribbon.  

7.  Take the fabric strips and fold in half.  Glue the middle (folded part) to the curved edge of one of the smaller cardboard pieces on the wrong side, or the side where the fabric is not covering it completely.  Repeat for the other tie and other small cardboard piece.

8.  Take the larger cardboard piece and lay right side down so that you are looking at the side with all of the glue.  Lay a smaller piece of cardboard on top covering the glue mess with the right side facing outwards.  Be sure it lines up with the perforations and that it doesn't cover them.  We want the lid to bend.  You can see what it will look like in the picture below.  With the tie coming out the middle and the fabric covered sides showing when the basket is open and when it is closed.  
8.  I glued on the ric-rac about 1/2 inch from the edges on the inside and outside of the lid.

To create the lining, I used a similar method as the one in my Vintage Inspired Easter Basket.  

1.  I traced the bottom of the basket.

2.  Cut it out and made sure it fit in the inside. 

3.  I added about 1/2 inch when I cut out the fabric to account for seams.  I measure the height and added 5 inches so that the fabric would come over the edges.  Like the Vintage Easter Basket, I cut out two strips of fabric for the sides.  BUT...before sewing any of the lining together serge around all edges or zig-zag and cut.  

4.  When you sew the short ends of the side pieces together, leave about 7 inches un-sewn at the top to fit around the handles.  

5.  I added ribbon to each end to tie around the handles. 

6.  Then attach it to the bottom piece.  
 

Now you have you beautiful picnic basket with a functional lid!  Take it to the park and bask in the sun. 


 If you're lucky, you'll have a lot of cleaning up to do after your little one destroys the lunch you  brought. 


This post was sponsored by:


Monday, May 2, 2011

Tiered and Bubbled

First, thanks for all of you who voted this weekend!  My "Extra Ordinary Day at the Park" creations won this weeks vote over at Extreme Makeover Fabric Edition.  Yay!  I'll be posting the tutorials this week so you can have an 'Extraordinary Day at the Park' too.  Sophie and I will be using our picnic blanket and basket this week...multiple times.

Second...my injured cutie got her cast off today!  Can you believe a month has already gone by?  Me either.  It's still a little sore and she has the worst rash I have ever seen, but nothing a little coconut oil and fresh air can't take care of.

Tutorial Time...sort of.
Tiered Bubble Skirt 
from EMFE week 2


This may be a little overboard for some of you, but I love how big this skirt is and think it's extra cute with the bubbled layers.

It is an extremely simple version of the "Be Mine" three tiered skirt.  In fact, I even had consult my tutorial a couple of times to remember how I made the original.  


This version was super easy and came together in about 20 minutes tops.  Not kidding.  


Here are the changes:
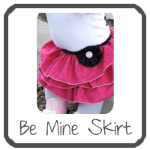
1.  Cutting.  You'll want to follow the Be Mine tutorial for the most part, but double the width of each tier.  Each tier will actually end up being the length you want the skirt to be in the end minus one inch.  This is so you can fold each tier in half to create the bubble.

2.  Gathering stitch.  Before you gather, fold the tiers in half and pin lengthwise with wrong  sides together so that you have a very long double layered piece.  Then sew your gathering stitch across the top of both layers to gather them at the same time.  

3.  Just like in the original tutorial, you want to finish gathering by hand, making each tier the same length as the skirt lining (hips plus 3 or 4 inches).
 This is what my sewing space most often looks like when I sew.  3 or 4 projects out all at once and a little munchkin spreading her books and toys across the floor and crawling around in places she shouldn't.  

4.  Once all your pieces are ready, draw the lines on your skirt lining piece and finish off the skirt as you would with the Be Mine version.  Just no hemming this time!

This is what happens when you take a toy away from an annoyed 11 month old.


This post was sponsored by: