Today's post is a re-post of what I did for my guest tutorial over at She Wears Flowers.
Since then I've added the fabric band you see above and the rosettes you see below. I love the band around the middle, but I'm still on the fence about the rosettes. I didn't make them permanent, so we'll see.
Now here's the original post:
My grandpa passed away over a year ago and I inherited a whole lot of sewing supplies from him. Amidst the collection of vintage buttons, fabric, lace, and trims, there was this:
The cutest little fabric covered basket.
SO, when I was at the thrift store a while ago I found this basket and knew just what I wanted to do with it.
Want to make one? It's easy peasy.
Materials:
Basket (any size will do)
Spray paint (optional)
Fabric (I used just under a yard)
Two handles (I actually bought 2 letter "O's" because they were the color I wanted and 2 for 1$)
Flexible tape measure
Fabric pen/pencil
Glue gun
Take measurements:
To measure the circumference I used a flexible tape measure around the outside of the basket for both the top and bottom.
My measurements came out like this:
Top Circumference: 26 inches
Bottom Circumference: 21 inches
Height: 6.5 inches
Add 2 inches to each (seam allowance) and record:
**these are the measurements you will use during the tutorial.
Top Circumference: 28 inches
Bottom Circumference: 23 inches
Height: 8.5 inches
You will also want to record the following measures:
1/2 top circumference: 14 inches
1/2 bottom circumference: 11.5 inches
***I spray painted the basket before I started the rest of this tutorial...sorry, no pictures.
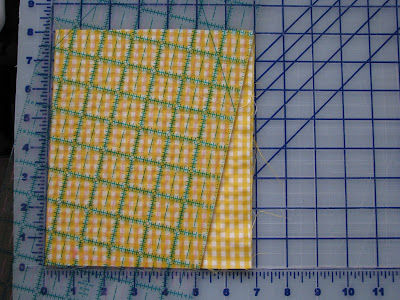
Cut two rectangles height x 1/2 top circumference. Mine turned out to be 8.5 x 14 (ignore the photo measurements, the yellow turned out to be too small and I had to correct it later).
Fold both rectangles in half. Be sure your corners line up exactly.
Take your ruler and line it up with the top corner and half the length of your 1/2 bottom circumference (1/4 of your full circumference). My 1/2 bottom circumference (which I wrote down earlier) was 11.5. Half of that is 5.25, so that is where the bottom of my ruler is lined up.
Cut.
You should have two trapezoids that look something like this:
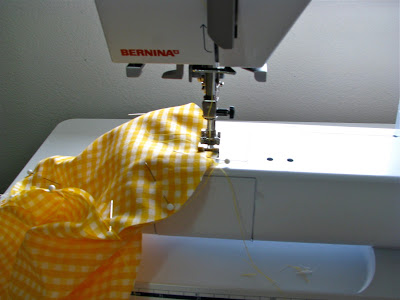
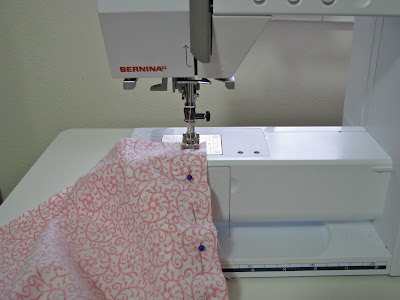
With right sides together, pin the trapezoids and sew with 1/2 inch seams down the slanted edges only.
Now you have this:
Take the basket and trace it onto a piece of fabric.
To account for seams I made marks 1/2 inch away from the traced basket and used them to draw a new circle. Then I cut along the new line. **It's really hard to tell in the picture, so I highlighted the marks.
Now you have this.
Pin with right sides together to the short end of the tube.
Sew together with 1/2 inch seam.
Now you have this.
Set it aside.
Take your fabric and cut 4 rectangles 10.5 inches by 1/2 top circumference. Mine turned out to be 10.5x14. You can adjust the 10.5 and make the handle longer or shorter if you would like.
Fold the rectangles in half and cut the corners. I cut a triangle that took off 3 inches from the top and 4 inches from the sides.
If your confused...here's the break down:
Fold cut edges over 1/4 inch and iron down on each of the pieces.
Top stitch along folded edge only.
Pin two trapezoids right sides together.
Sew with 1/4 inch seam along top (short end) only.
Iron seams.
Fold in half with right sides together and the seam at the top. Pull fabric through handle so it looks like this:
Pin both sides of the fabric around the handle.
Sew with a 1/4 inch seems.
When you reach the top stitched section (previously sewn) sew directly over previous stitches instead of the 1/4 inch seam.
Stop when your foot hits the handle.
Iron flat.
Repeat the above steps for the other handle.
Using your glue gun, glue the handles to the outside of the basket (raw edges lined up with the top of the basket). I used the rim of the basket as my guide.
That way, when you pull up the handles it will look even. If you do not have a rim, draw a line on your basket to keep it even as you glue.
Take the piece you set aside earlier. I tossed the yellow and remade it in pink. Sorry for the change up. Iron down the top edge 1 inch (more or less depending on how much you want showing).
Top stitch to keep in place.
Stuff inside the basket with right side facing out.
Glue the edge down directly over the rim to cover where you glued the handles before.
And thats it! Now you have a vintage inspired Basket to use for whatever you please.
Easter eggs anyone?
A perfect hiding place for my favorite Easter treat. Sick, I know, but I love them.














Dear Ellie,
ReplyDeleteas you probably know, I have a blog, showing collected ideas from all over the www. I love what you’ve shown here and want to show this idea at 17. April. I fit ist not okay that I show your idea, please send me an e-mail or leave me a comment. Otherwise I assume that it is okay to show it. Thanks.
Yours,
Katrin
The basket is darling! I love that you recreated it from a vintage one.
ReplyDeleteYour daughter is adorable! Reminds me of mine when she was that age {sigh}. BTW, her name is the same as yours :)
Love this! And after seeing your latest extreme makeover project I think I'm going to make one of these for a picnic basket! I have some old wood 1/2 bushel and bushel baskets that are still in good shape but are stained. With a little paint and some fabric they would be perfect! I just picked up some great vintage fabrics at a garage sale over the weekend! I'm so excited to make this!
ReplyDeleteThanks for the idea!