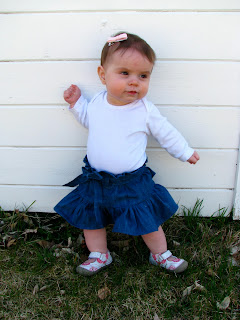
I love denim. I think it is the most versatile part of any wardrobe...so easy to dress up or down and goes with just about everything. Baby S needed some cute denim in her spring/summer wear, so this skirt was born. I think it's my favorite skirt to date. If I make it again I might tweak it a little, but overall, I like it a lot.
Ok, so I need to clarify...I actually used a chambray for this skirt. It's lighter and easier to gather than denim, but if you have an old worn out skirt or pair of jeans you want to recycle, you could probably still pull it off.
The numbers in red are those used to make a skirt that fits my small 9 month old (like she still fits in her 3-6 month clothes with room, small). Adjust numbers as necessary.
Materials:
1/2 yard fabric (more for larger skirts)
1/2" wide elastic
coordinating thread
Construction:
1. Measure.
A. Measure around the fullest part of the hips. Mine was 21".
B. Measure from the waist to desired length. Mine was 10" for a high waisted skirt.
C. Measure around the waist. Mine was 16".
2. Calculate and Cut. Stay with me. I have it written in what looks like a lot of steps, but it's just a few rectangles and actually really easy.
You will end up with 5 pieces for this skirt.
The picture above shows pieces 1- 4. However, I had to trim a few inches off of pieces 1 and 2 after taking this picture. The directions below are more accurate than the photo.
Piece 1 and 2:
Take measurement A and add 5 inches (4 for roominess and 1 inch for seems). Then divide that length in half. This will be the width. You could skip this step and keep it as one long piece for a single seem skirt.
Example:
21" + 5" = 26"
26"/2 = 13"
For the length, take your measurement B and add 1 1/2" (seams and top hem). Then subtract 4 inches (for the ruffle bottom).
Example:
10"+ 1 1/2" = 11 1/2"
11 1/2" - 4" = 6 1/2"
My first two pieces will be 13" x 6 1/2"
Pieces 3 and 4:
Take measurement A and add 5 inches.
Example:
21" + 5" = 26"
Cut 2 pieces that are (A + 5") by 5".
My pieces are 26" x 5".
Piece 5:
The last piece is for the bow that ties in front. Take Measurement C and add 15".
Example
16" + 15" = 31"
Cut a piece that is (C + 15") by 2 1/2" (larger if you want a thicker belt).
My piece is 31" x 2 1/2".
**I also added 4 belt loops to the skirt at the end. If you would like to add this, cut 4 rectangles that are 2 1/2" x 2". If you made the bow larger, you will need to lengthen the belt loops to accommodate a larger belt.
3. Prepare the ruffled bottom of the skirt.
Take the two longest pieces (3 and 4). For the bottom hem, fold over 1/4" and iron. Then fold over 1/4"again and iron.
With right sides together, sew a 1/2" seam down the short edges of these pieces to create a tube with two seams. Serge off seams or zig sag and trim. When I sewed my pieces together I opened up the hem (as seen below) then re-folded it after it was sewn to hide the seam inside the hem.
Ignore the serged edge above. It is unnecessary when making a double fold hem.
Set your machine to a gathering stitch (longest thread length, highest tension) and sew across the top of the piece with a 1/4" seam. Pull the bobbin thread to gather to desired length, or the length of your main skirt piece which should be measurement A + 5". Mine is 26".
4. Prepare the skirt.
Some of the pictures for step 4 turned out too blurry to post. We're still dealing with horrible weather/no sunlight some days.
Sew main skirt pieces (1 and 2) together along short edges, right sides together, with 1/2" seam to create a tube. Serge off seams or zig zag and trim. I also serged the top of my skirt at this point (no pictures).
Fold down the top of the skirt 3/4 inch and iron down. If you did not serge you will need to fold over 1/4" then 3/4" again and iron flat. (I did this after attaching the ruffle, but I recommend doing it before.) It is important to follow these measurements exactly in order to attach the elastic properly later on.
Top stitch with a 1/2" seam to finish the top of the skirt.
5. Attach the ruffle.
With right sides together, line up the seams of the ruffle with the seams of the skirt and pin.
Sew ruffle onto skirt with 1/2" seam. Serge off seams or zig zag and trim.
Now you should have a piece that looks like this (except your top will already be hemmed and finished).
6. Creating the elasticated waist.
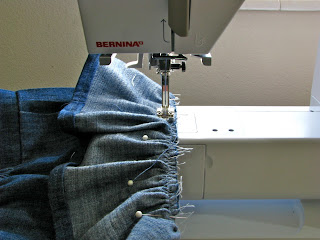
Take your elastic waistband and pin in 4 spots (evenly spaced) right below the top hem inside the skirt. To be sure your pins are evenly spaced, I pin at the side seams first and then find the mid point between the side seams on the elastic and the skirt piece and pin there as well.
The next one is kind of blurry, but may be more helpful.
Then, using one hand as your guide and the other to stretch the elastic as you go, sew your elastic onto your skirt by sewing a 1" seam on top of your skirt. Stretch and sew from pin to pin.
You skirt is finished!
***UPDATE: I recently made another version of this skirt with a casing for the elastic. Looks very similar on the outside, but quite a bit nicer on the inside if that matters to you at all. All I did was cut a strip of fabric 2 1/2 inches wide. I ironed in the long ends 1/2" on each side and sewed it to the inside of the skirt leaving an opening for the elastic to be inserted, closing it up afterwards.
7. Make the bow.
Take your long bow piece. Fold in half lengthwise with right sides together and sew a 1/4" seam. I attached a safety pin to the inside of the fold before sewing to help turn it right side out after I sewed.
Trim edges on a 45 degree angle.
Clip corners (like the triangle below. Then tuck in edges in and iron flat.
Top stitch around the entire belt piece to secure edges.
8. Belt loops.
***UPDATE: For an easier/better/prettier looking belt loop, go to my tutorial HERE. You will be sad if you don't because the method below is not so fun.
This was the most annoying part, but worth it. Fold your pieces in half right sides together and sew along two edges leaving one short end open. Again, I attached a safety pin inside the fold to help turn them right side out after sewing.
Clip corners.
Push safety pin out open end to turn. Push out corners.
Top stitch around entire belt loop.
Pin belt loops to skirt. I attached them about 3 inches about in the middle of the front and the middle of the back. I made sure the top of the belt loop was 1/4" above the thread that attached the elastic waistband. To make sure the belt loops are on evenly, stretch out the waistband.
Attach belt loops by to skirt by sewing 1/4" from the top of the belt loop (in line with the waistband seam) and 1/4" from the bottom of the belt loop.
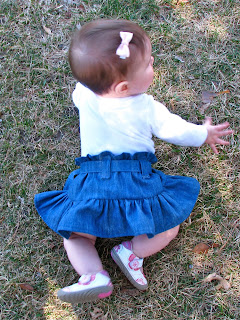
Thread your belt through the loops and tie a bow in the front (I think it looks cute with the bow in back too)!
And you are done! It took me about 1 hour to finish this skirt (that was with taking pictures and re-adjusting measurements). In all, a pretty fast completion. Love that!
Yes, the skirt is on crooked, but it's the only front shot I took so I'm trying to deal with it.
Sorry about the middle finger. I didn't notice till after I took it but I still kind of love this picture....not sure what that says about me.
Yes, we're crooked again. I made the skirt about 1/2" too big so that it will fit longer. I'm now paying for that decision.
I've linked this up to
these lovely places.
This post was sponsored by whoopdwhoop; the currency free, creative marketplace.


