


First, thanks for all of you who voted this weekend! My "Extra Ordinary Day at the Park" creations won this weeks vote over at Extreme Makeover Fabric Edition. Yay! I'll be posting the tutorials this week so you can have an 'Extraordinary Day at the Park' too. Sophie and I will be using our picnic blanket and basket this week...multiple times.
Second...my injured cutie got her cast off today! Can you believe a month has already gone by? Me either. It's still a little sore and she has the worst rash I have ever seen, but nothing a little coconut oil and fresh air can't take care of.
Tutorial Time...sort of.
Tiered Bubble Skirt
from EMFE week 2


This may be a little overboard for some of you, but I love how big this skirt is and think it's extra cute with the bubbled layers.

It is an extremely simple version of the "Be Mine" three tiered skirt. In fact, I even had consult my tutorial a couple of times to remember how I made the original.
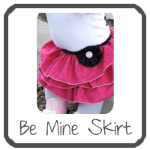
This version was super easy and came together in about 20 minutes tops. Not kidding.

Here are the changes:
1. Cutting. You'll want to follow the Be Mine tutorial for the most part, but double the width of each tier. Each tier will actually end up being the length you want the skirt to be in the end minus one inch. This is so you can fold each tier in half to create the bubble.
2. Gathering stitch. Before you gather, fold the tiers in half and pin lengthwise with wrong sides together so that you have a very long double layered piece. Then sew your gathering stitch across the top of both layers to gather them at the same time.

3. Just like in the original tutorial, you want to finish gathering by hand, making each tier the same length as the skirt lining (hips plus 3 or 4 inches).

This is what my sewing space most often looks like when I sew. 3 or 4 projects out all at once and a little munchkin spreading her books and toys across the floor and crawling around in places she shouldn't.
4. Once all your pieces are ready, draw the lines on your skirt lining piece and finish off the skirt as you would with the Be Mine version. Just no hemming this time!


This is what happens when you take a toy away from an annoyed 11 month old.


This post was sponsored by:


Love it--I knew it was yours! ;) I thought about doing something like this recently, but my little one doesn't need anything bigger--she isn't so little! haha! It is adorable on your little one!
ReplyDeleteHa, I knew it! Sorry I missed voting. Congrats on the win! Can't wait to see what you do for the next week!
ReplyDeleteHahaha! That crying pic is classic.
ReplyDeleteOh, and the blanket/checker board? Genius. "King me." Hahahahaha LOVED IT! Seriously that project was awesome!! Picnic basket = adorable.
ReplyDeleteCan you make me a skirt like this? :) Loved your last project on Extreme Makeover...you deserved to win!
ReplyDelete